Step 5: Create Data Synchronization Task
Creating Your First Data Synchronization Task
Now that you have set up your source and target databases, you're ready to create a data synchronization task. This task will continuously synchronize data between your databases, keeping your data consistent and up-to-date in real-time.
Step-by-Step Guide
1. Navigate to the Tasks Section
In the XPipes dashboard, click on Tasks in the left navigation menu, then click the Create button.
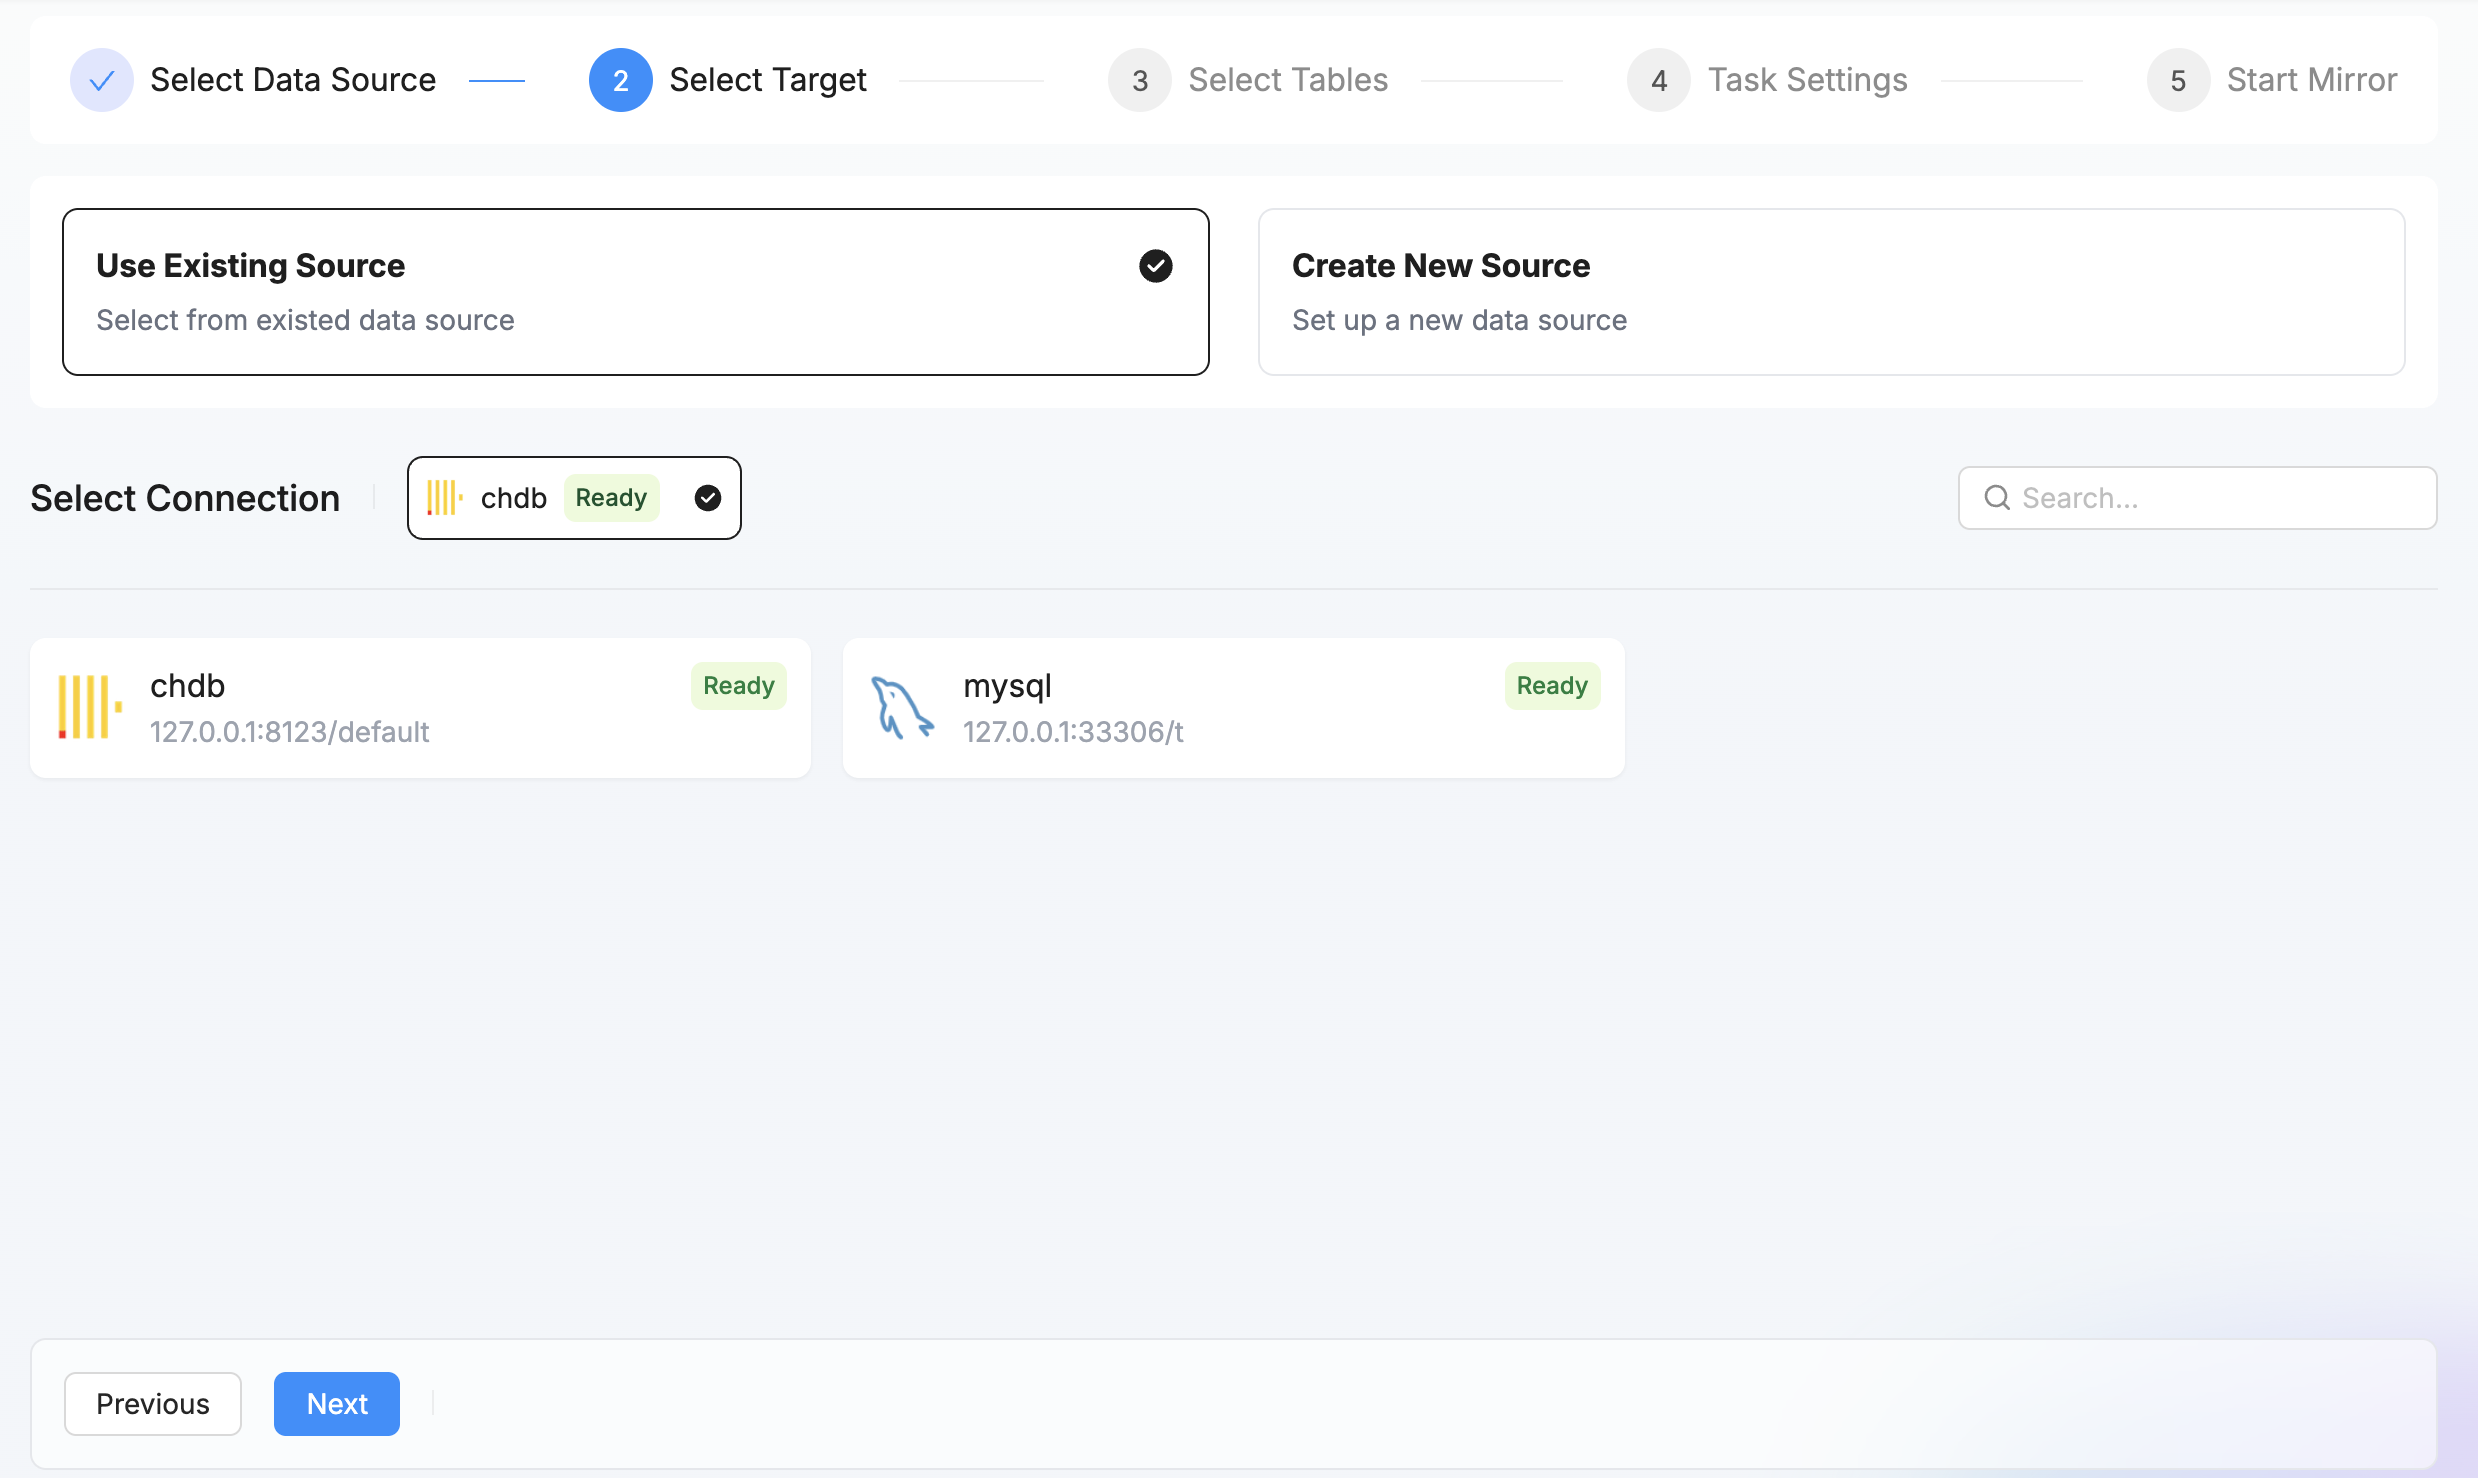
2. Select Source and Target
In the task creation wizard:
- Select your source connection
- Select your target database connection
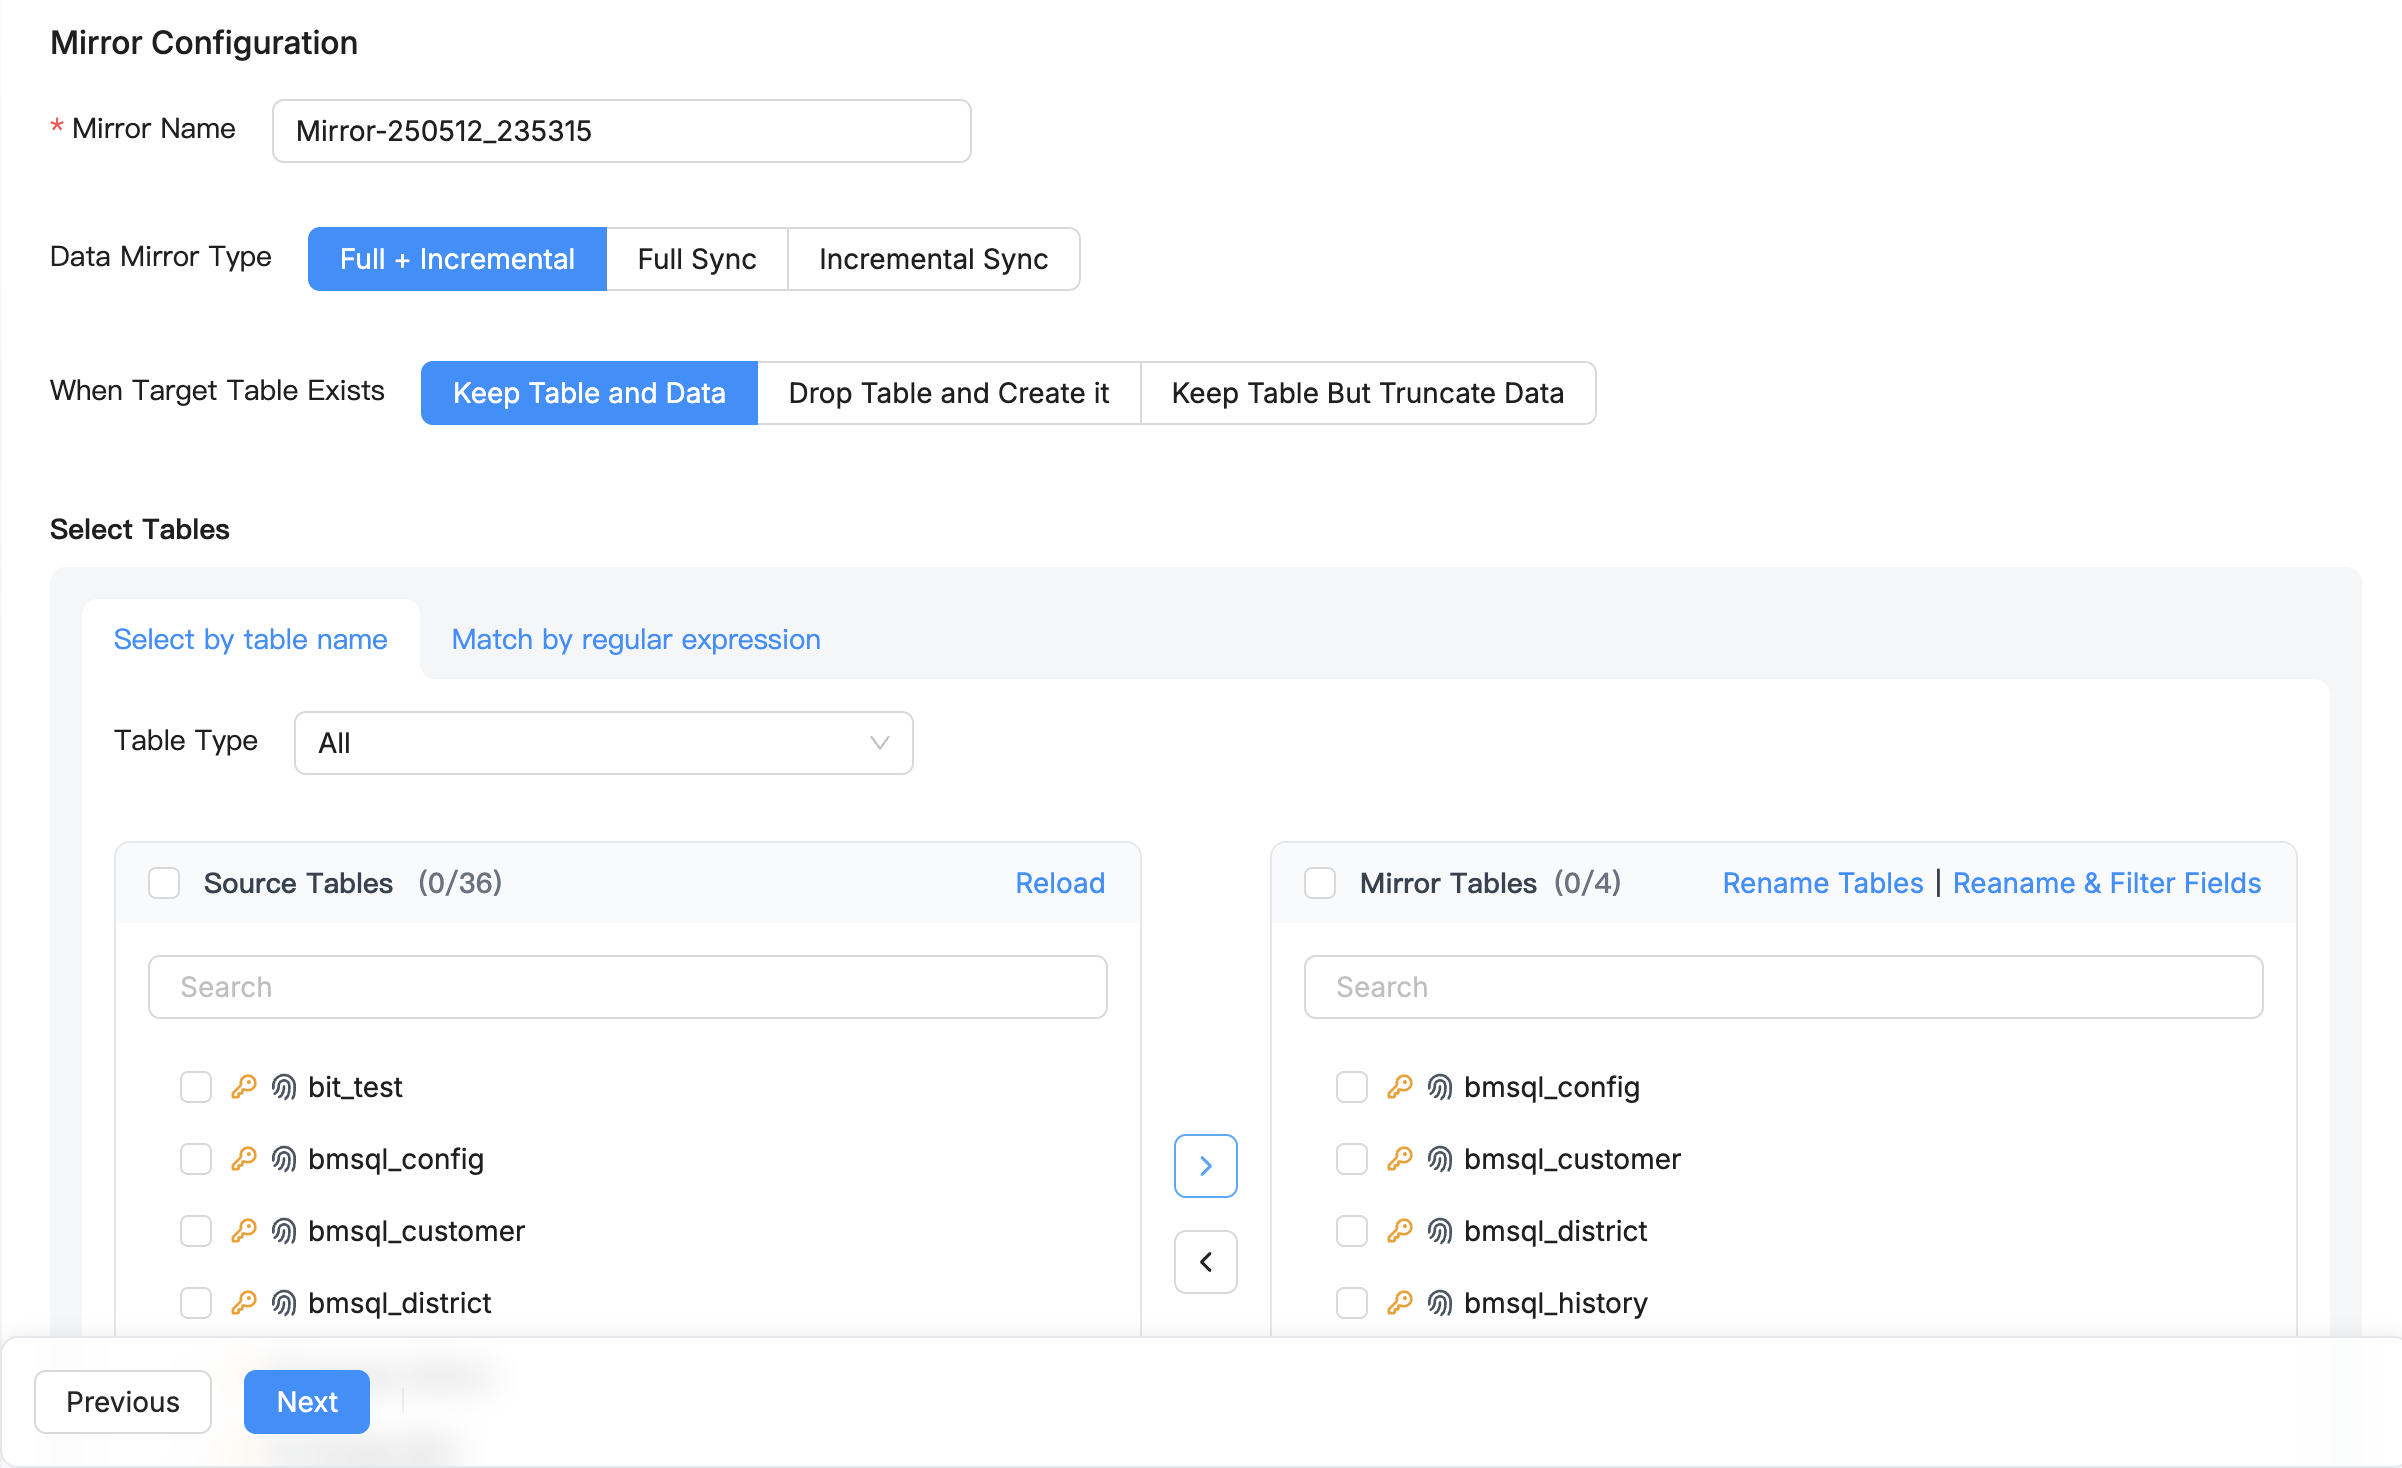
3. Select Tables to Synchronize
Choose which tables you want to synchronize from your source database:
- You can select individual tables or use the Select All option
- For each table, you can customize:
- Which columns to include
- Whether to sync full data or incremental changes only
- Transformation rules (optional)
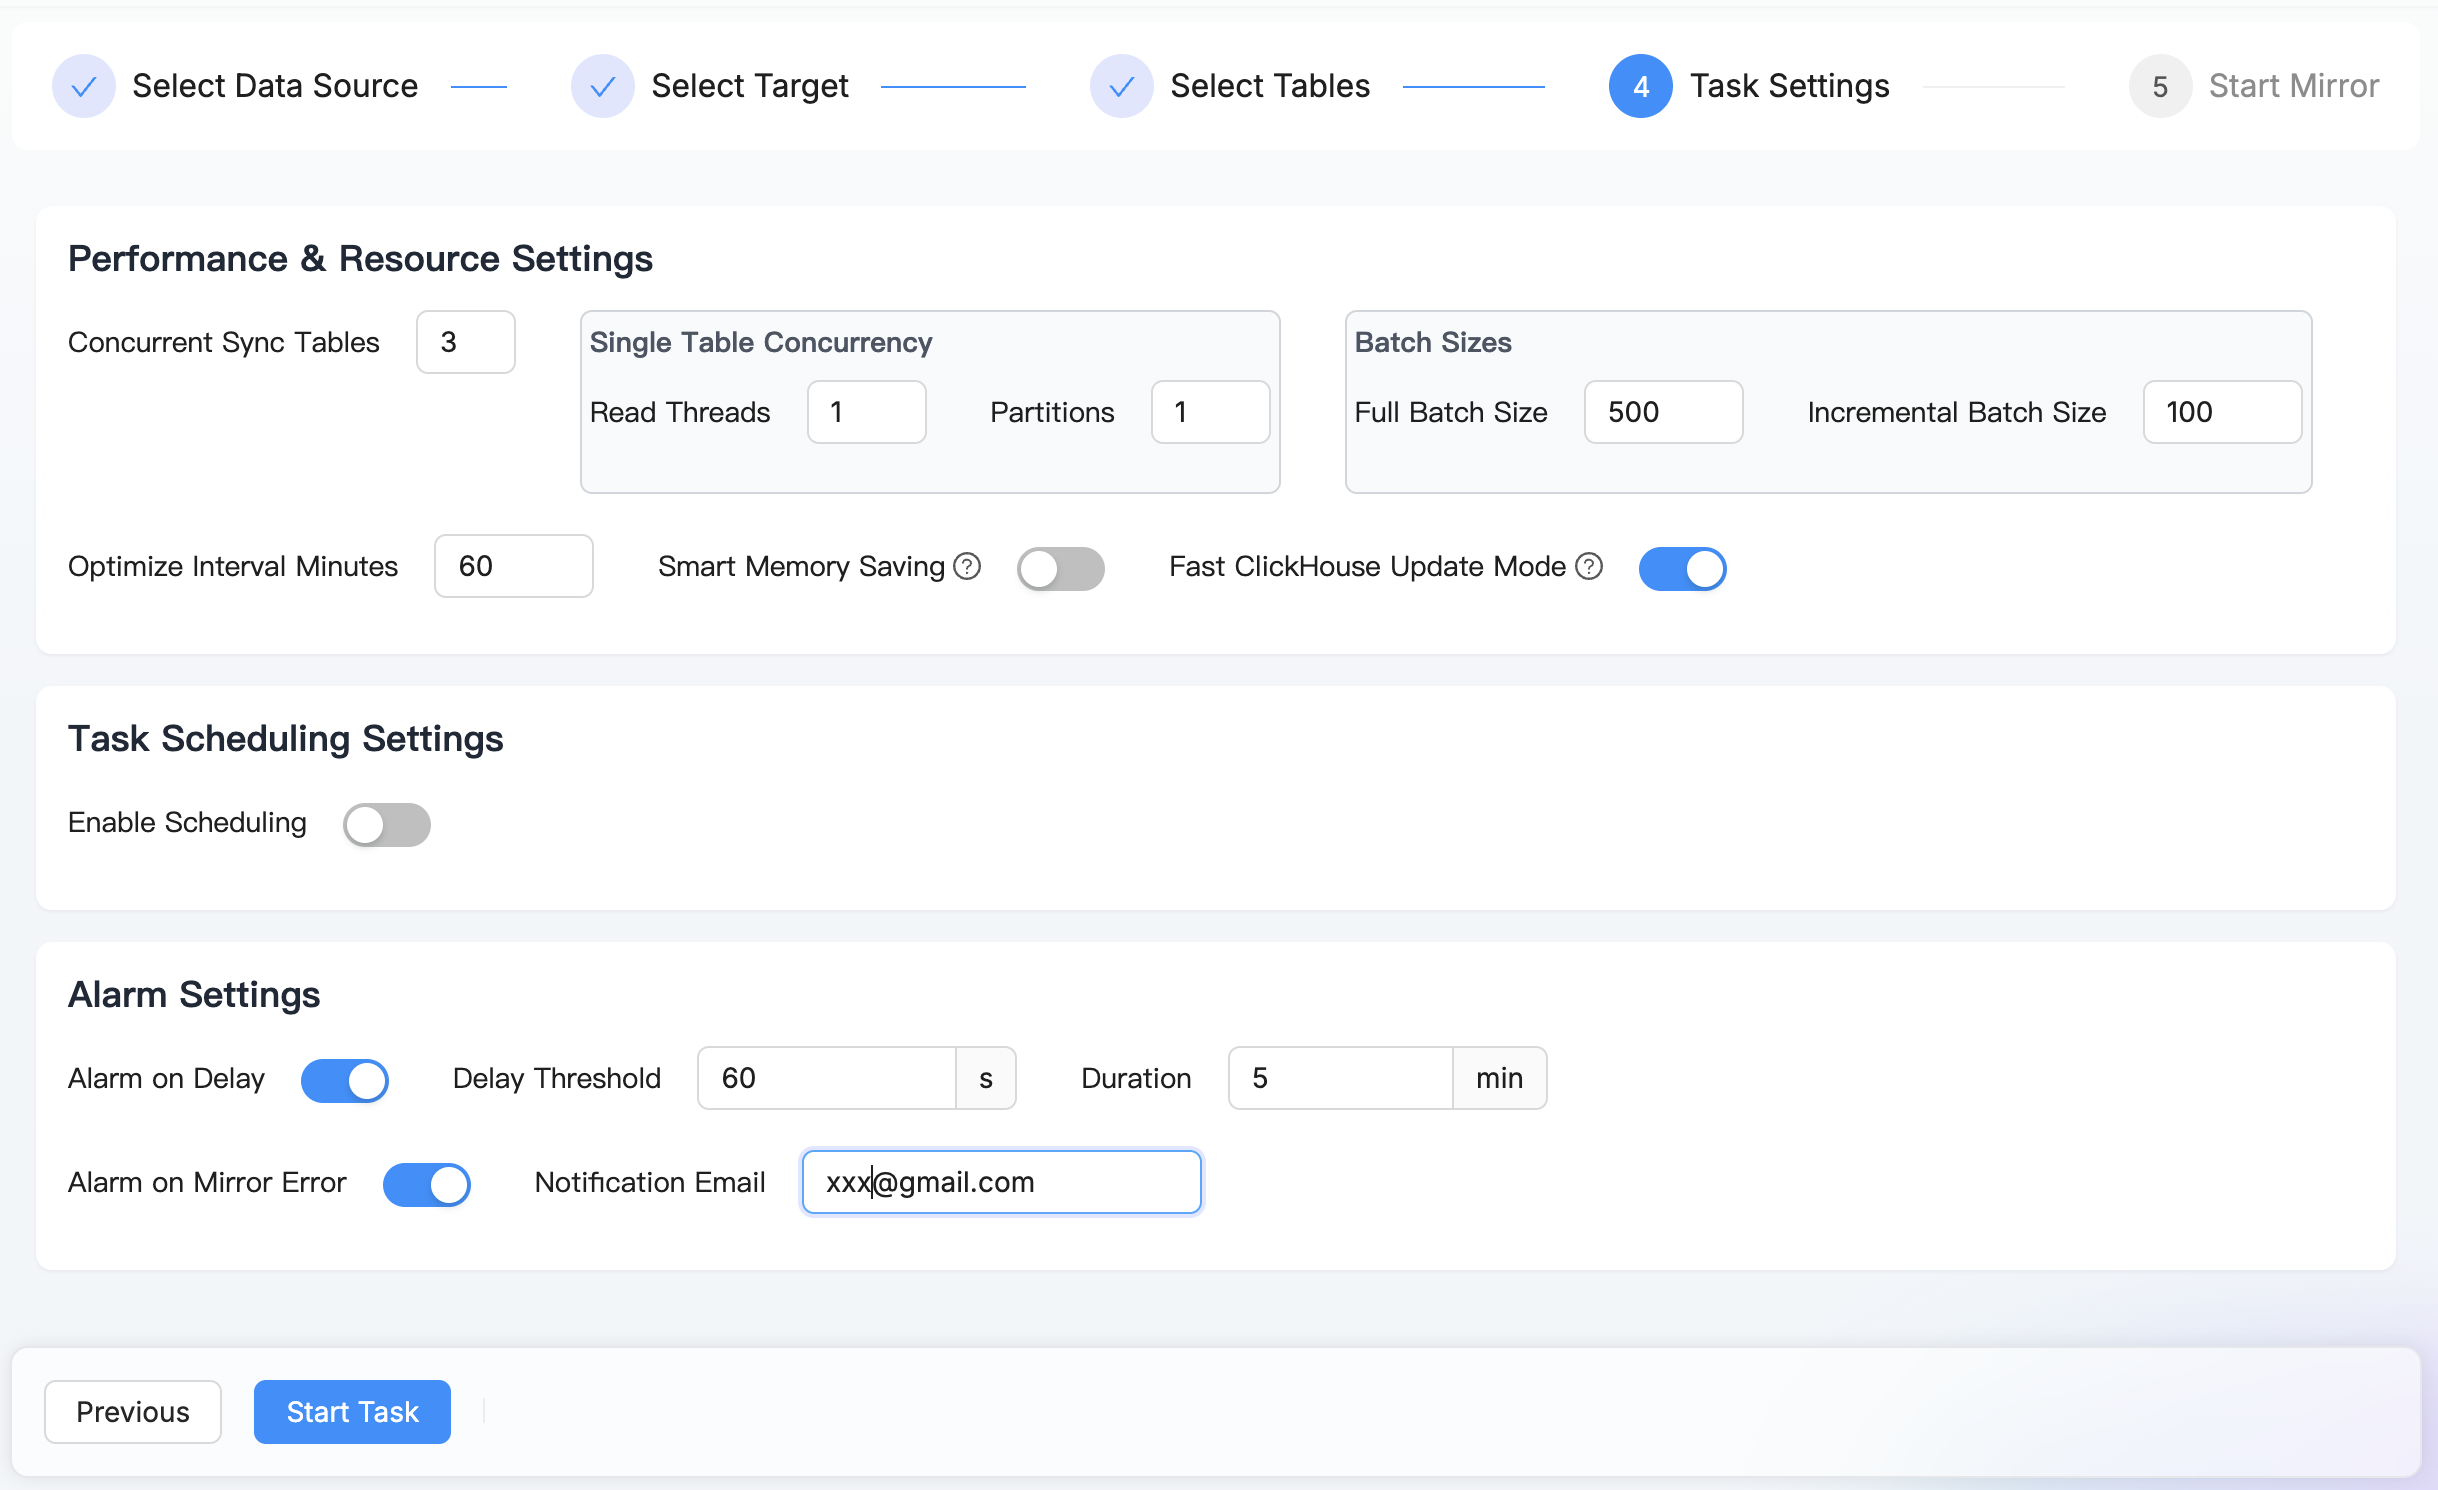
4. Configure Synchronization Settings
Configure various task-related settings, such as:
- Performance Configuration:
- Source Table Concurrency: Control the number of tables processed simultaneously
- Single Table Read Concurrency: Optimize reading performance for large tables
- Target Write Batch Size: Adjust batch sizes to balance performance and resource usage
- Resources and Monitoring:
- Memory Usage: Set memory limits for the task
- Scheduled Execution: Configure task execution time and frequency
- Task Alerts: Set up notification rules for exception scenarios
5. Start the Task
Review your settings and click Start Task to begin the synchronization process.
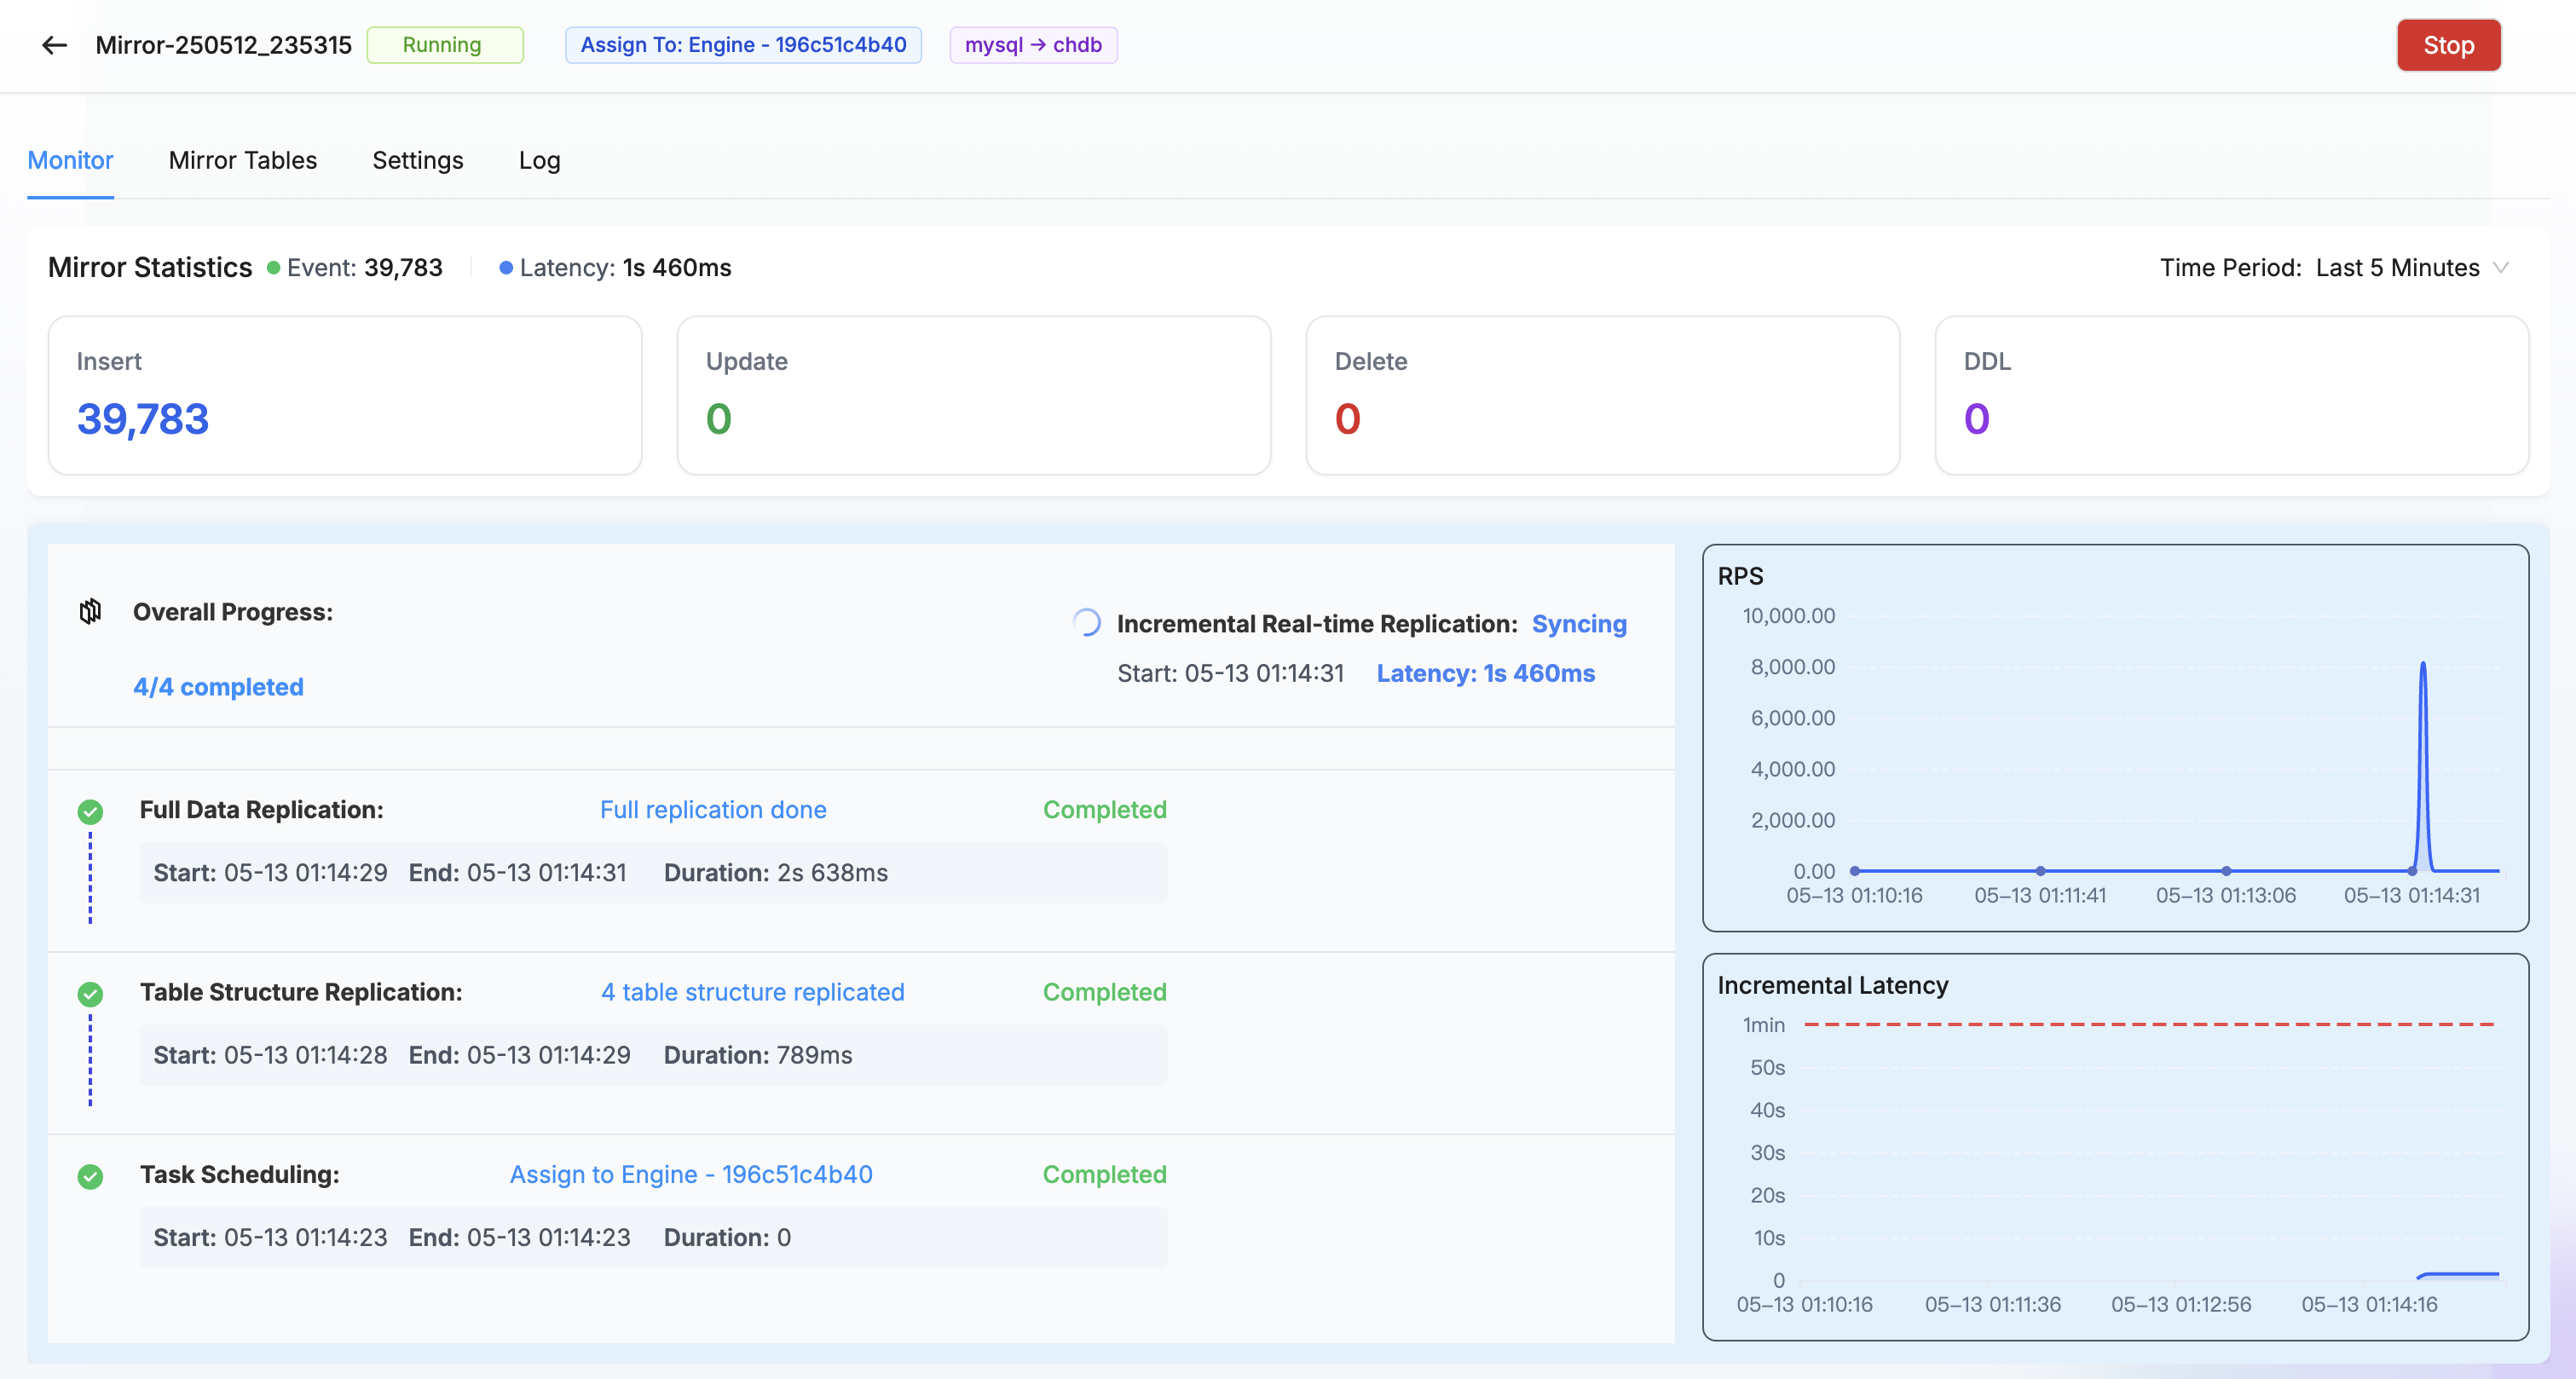
6. Monitor Progress
Once your task is running, you can monitor its progress:
- The dashboard shows real-time metrics including:
- Records processed
- Current throughput
- Sync status for each table
- Latency
- Wait for the initial synchronization to complete. Depending on your data volume, this could take from minutes to hours.
Next Steps
After your data is successfully synchronized between your databases, you can:
- Query your data directly in your target database for analytics
- Set up additional synchronization tasks for other database pairs
- Connect BI tools to your synchronized databases for visualization
- Monitor synchronization performance and data consistency